


How to Apply Foundation: 20 Expert Tips
Foundation is the canvas of your makeup look. It sets the stage for everything else, from blush and bronzer to highlighter and eyeshadow. Whether you’re just learning how to apply foundation on face or searching for the best way to apply liquid foundation, mastering the basics ensures a flawless, even look every time. In this blog, we'll explore 20 expert tips on how to apply foundation like a pro, but first, let’s delve into some essential information that will help you get the most out of your foundation application.
Understanding the Basics of Skin Foundation
Skin foundation is your go-to magic potion for that flawless, even-toned look. But what is it really? At its core, foundation is a makeup product designed to create a smooth base, covering imperfections and evening out your skin tone. It comes in various forms like liquid, powder, cream, and stick each with its unique benefits.
First things first, it is important to know your skin type! Are you oily, dry, combination, or sensitive? This helps you pick the right formula. Then, color matching is crucial! Always test the foundation in natural light. The perfect shade will blend seamlessly into your skin. Don’t forget about undertones - are you warm, cool, or neutral? This tiny detail makes a big difference.
Lastly, application is key. Use a makeup brush or makeup sponge to apply foundation, blending from the center of your face outward. And remember, less is more you can always build up coverage if needed.
Pro tip: Your summer and winter shades might differ, so don’t be afraid to switch them up with the seasons!
Prepping Your Skin Before Applying Foundation
Skin preparation is a non-negotiable step in foundation application. Cleanse your skin to remove any dirt and oil, then follow up with a moisturizer to create a smooth base. For those with oily skin, using a mattifying primer can help control shine throughout the day. For dry skin, a hydrating primer can provide a dewy finish.
Now that you've familiarized yourself with the essential groundwork, understanding your skin type, selecting the right foundation, and prepping your skin, it's time to explore more details of how to apply foundation like a pro. These 20 expert tips will guide you step by step, helping you achieve a flawless, long-lasting finish that enhances your natural beauty. Whether you're new to makeup or looking to refine your technique, these insights will take your foundation application to the next level.
Begin With a Clean Canvas
A successful skincare routine starts with clean skin. Before applying foundation, use a cleanser to remove dirt, oil, and other impurities from your skin. Doing this will not only unclog your pores but also prevent your foundation from looking uneven or flaky.
Then, apply a moisturizer, as foundation works best on hydrated skin. This will provide a solid base for your foundation and help it work more effectively.
Use a Primer
Should you prime or not? It's a contentious question even among professional makeup artists. Whether you choose to prime or not comes down to personal preference. However, we recommend using a primer. Sure, using one may make your makeup routine longer, but it will help your foundation last longer.
So, go ahead and use a high-quality primer. You'll thank yourself later in the evening when you have a special event to attend, and your makeup still looks as flawless as it did in the morning.
Select the Right Makeup Foundation Type
Not all makeup foundations are created equal. There are various foundations, though the two most popular ones are powder and liquid foundations. Powder foundation is typically easier to apply than liquid formulas. However, liquid foundation generally offers better coverage and more natural finishes.
While foundation choice comes down to personal preference, we recommend using a long-lasting liquid foundation for flawless results.
Use a Clean Makeup Sponge
Beautyblenders offer striking results when used for makeup application. However, make sure you clean your Beautyblender before applying your foundation, as debris from previous makeup applications can lead to a cakey and uneven finish.
Use a Bouncy Beauty Sponge
Makeup sponges have different densities. While some sponges are firm, others are bouncy. Use a bouncy makeup sponge for a streak-free and smooth liquid foundation application.
Use Separate Beauty Sponges
You can use your makeup sponge to apply various makeup products such as liquid foundation, concealer, highlighter, blush, and more. However, experts recommend using one sponge for foundation and another for other makeup products for best results
.
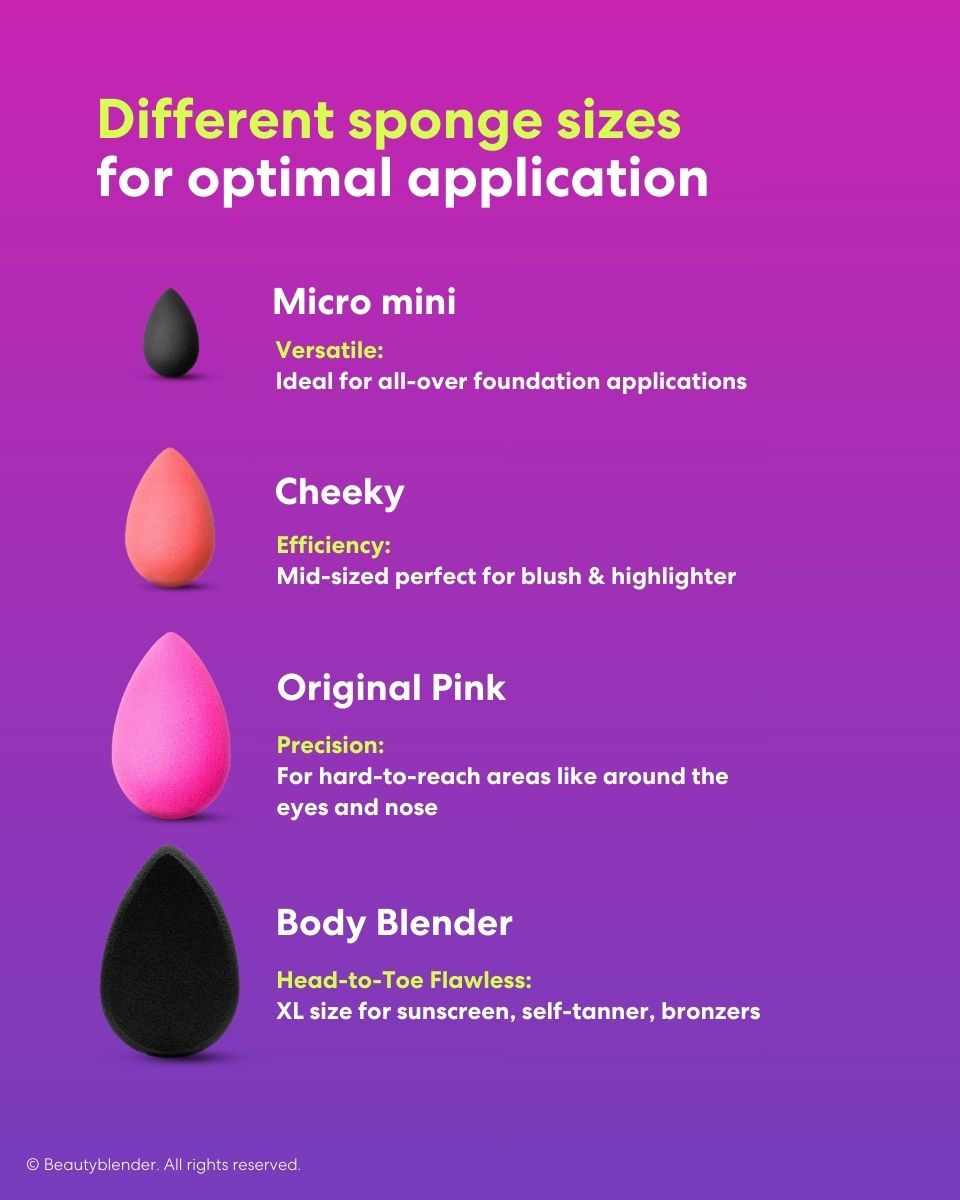
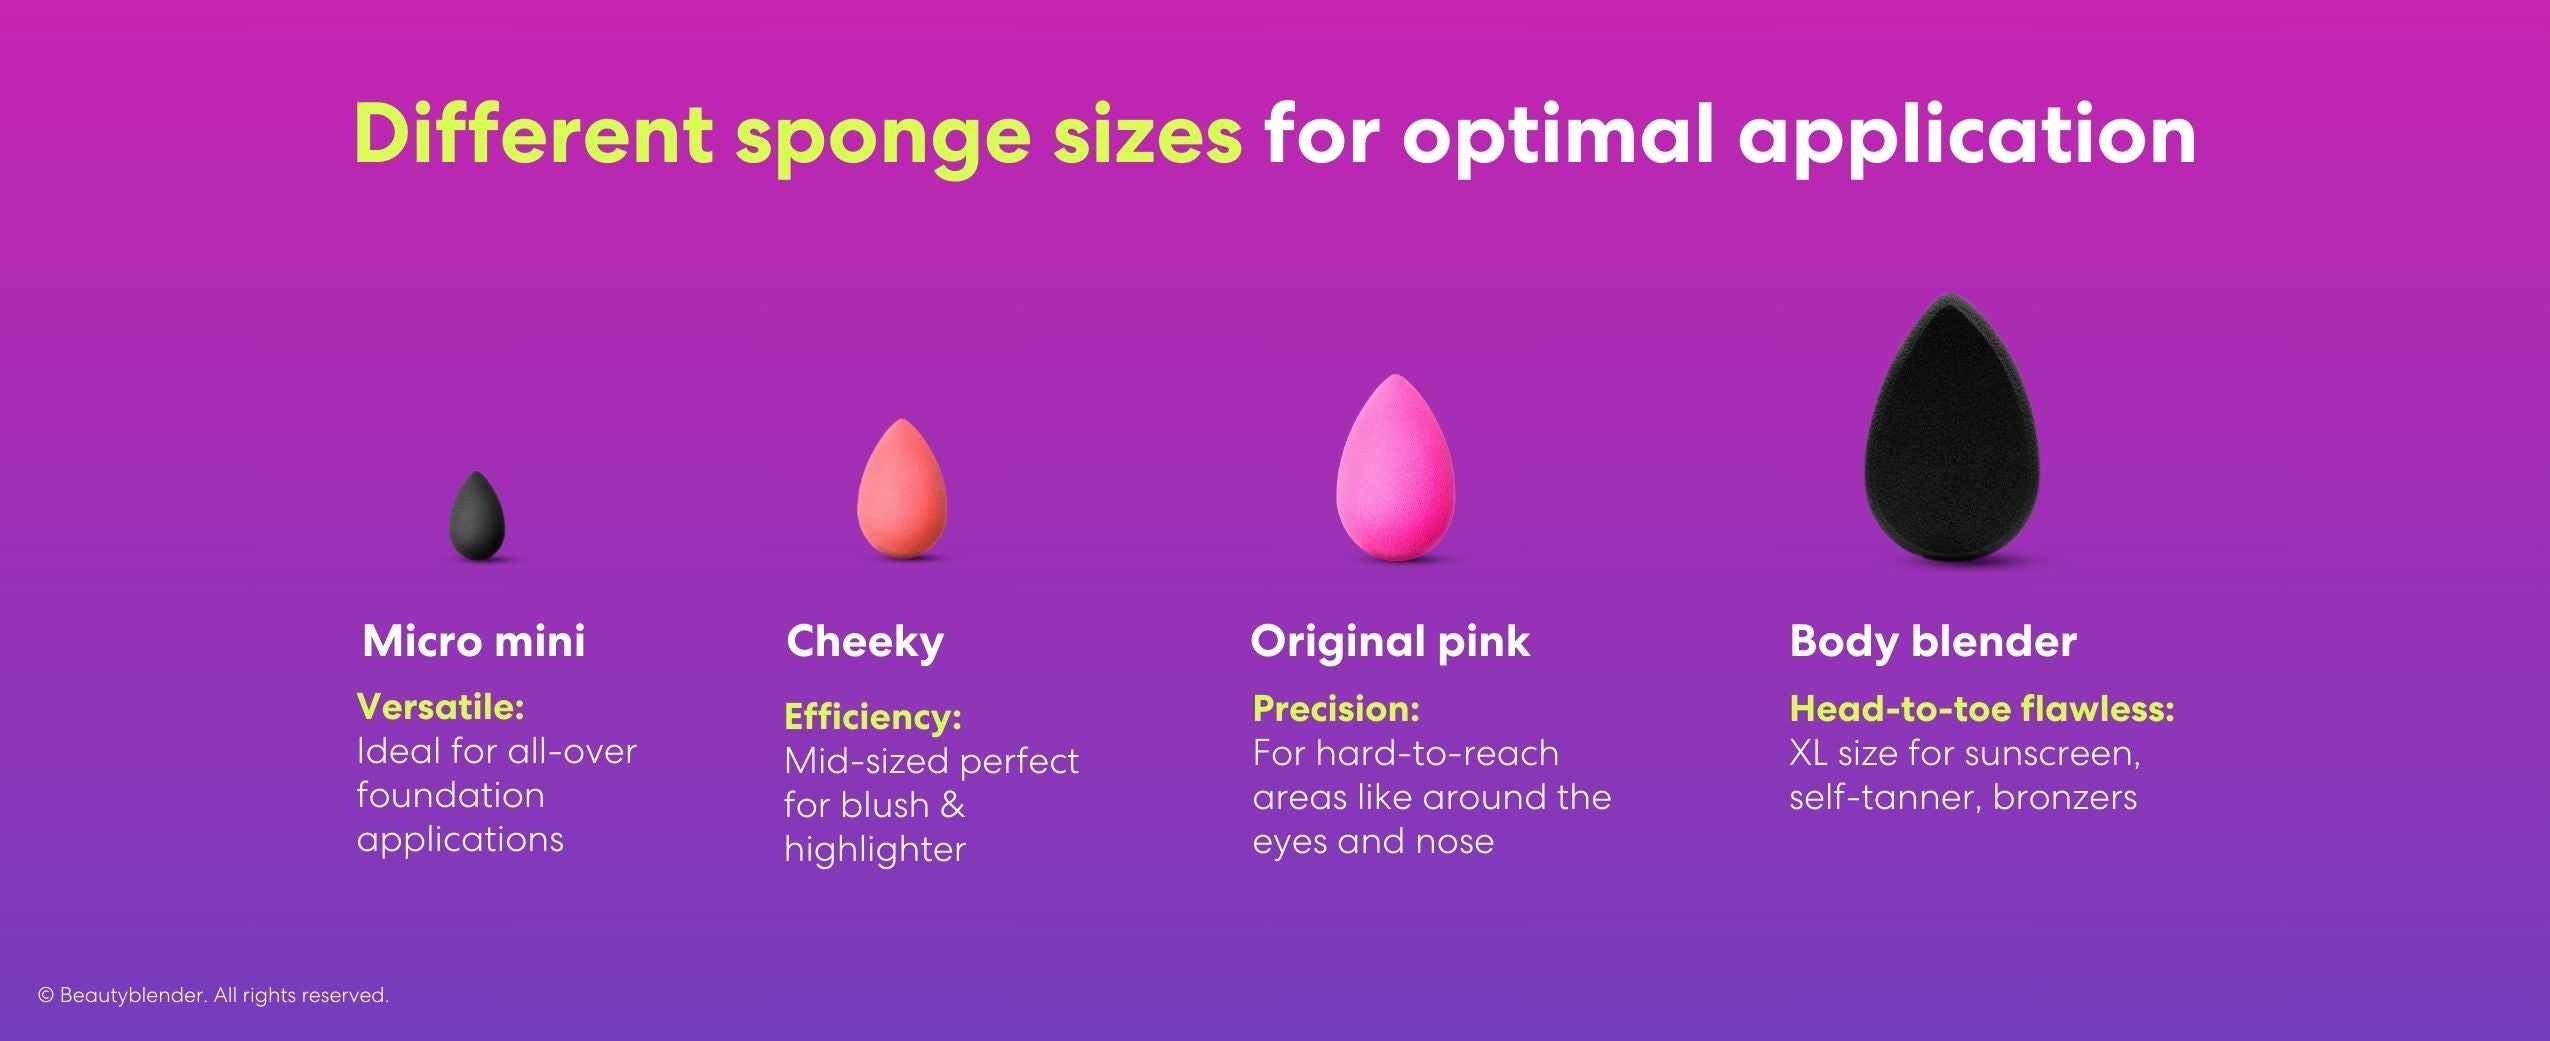
Use Different Beautyblender Sizes
Makeup sponges come in various sizes. Generally, large sponges like our Original Beautyblender are ideal for applying foundation to large areas such as the forehead and cheeks.
On the other hand, smaller sponges like our Micro Mini makeup sponge are better suited for applying foundation around tough-to-reach spots like under the eyes or around the nose. Use different sponges for optimal foundation coverage.

Choose an Effective Foundation Application Method
You can apply foundation using your fingers, a makeup brush, or a beauty sponge (Beautyblender). While each application method has pros and cons, experts recommend using a makeup sponge. Why? Using one is undoubtedly the best way to achieve a flawless and natural finish, as using your fingers or a makeup brush may leave streaks.
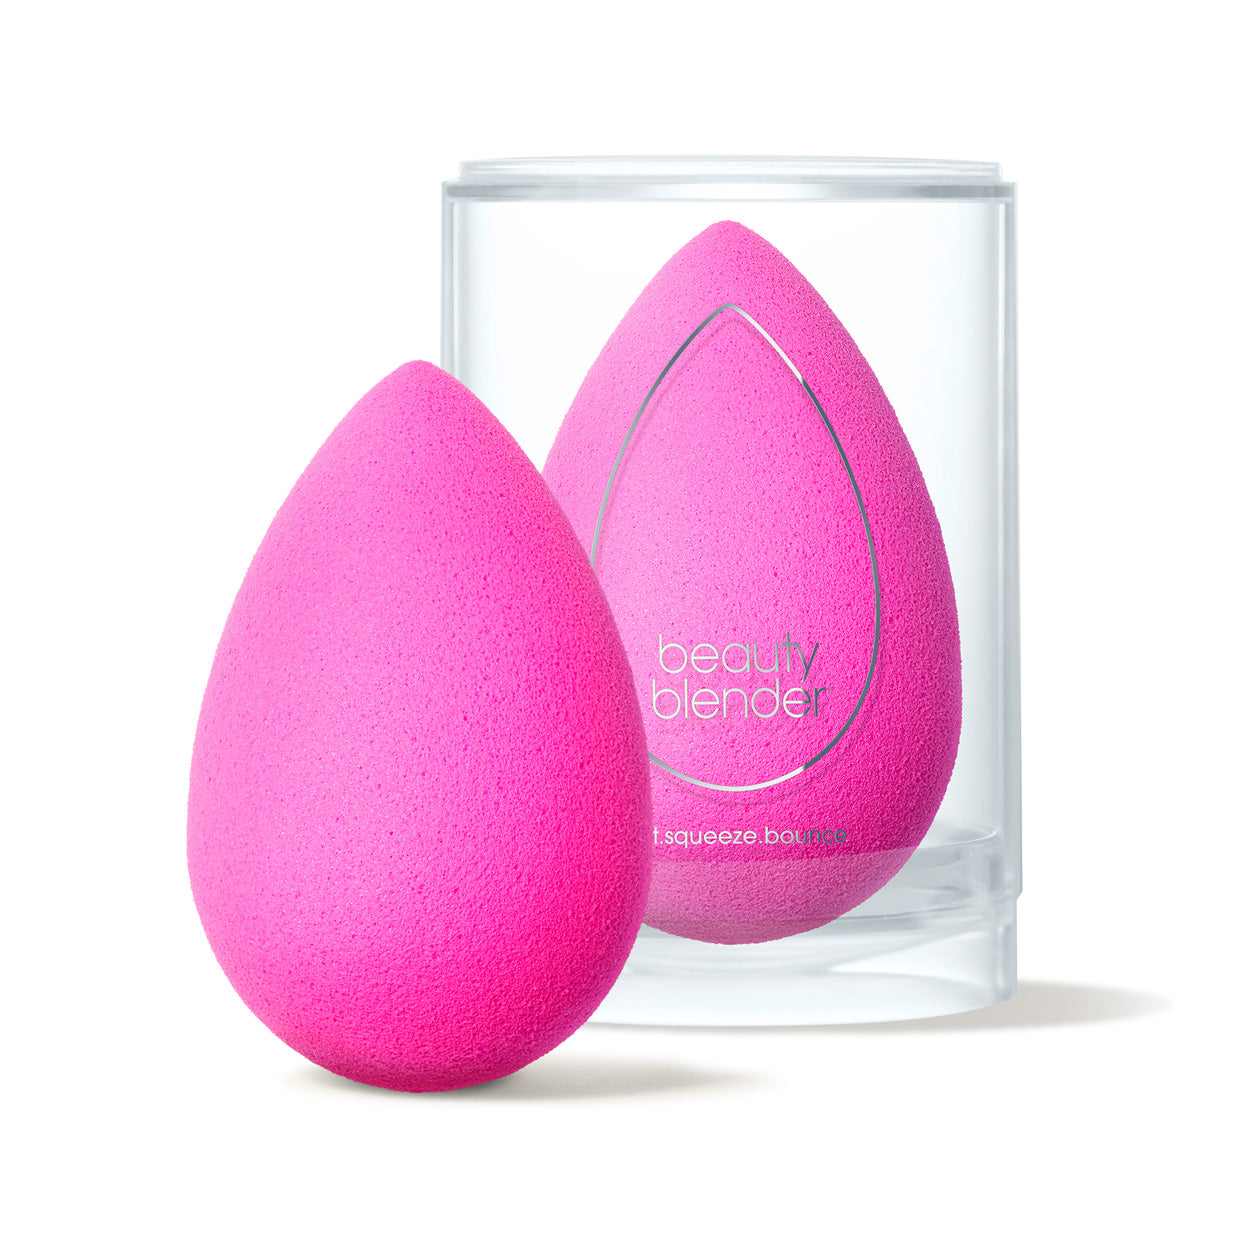
Maximize your blend with superior quality
Get flawless results with the expertly designed shape and quality of super-soft Beautyblender makeup sponge. Its high-performance foam is crafted to blend foundation effortlessly, giving your skin a seamless, airbrushed finish. The sponge absorbs minimal product, so you get the most out of your favorite formulas, with more coverage on your complexion—not stuck in the sponge.
Apply Minimal Foundation
Less is more when it comes to several makeup products, including foundation. Apply small amounts of liquid foundation to your face before spreading. Adding more liquid foundation for extra coverage is much easier than removing excess foundation.
Pro tip: You don't need to apply foundation evenly all over your face. Instead, you should apply it strategically to even out your complexion. If you need to apply liquid foundation across your entire face, you're probably using an inappropriate shade. Use a foundation shade finder to determine your perfect shade.

Bounce™ Liquid Whip Cream Blush
Add To Cart
Bounce™ Magic Fit Creamy Bronzer & Highlighter Duo
Add To Cart
Bounce™ 12-Hour Always On Radiant Skin Tint
Add To Cart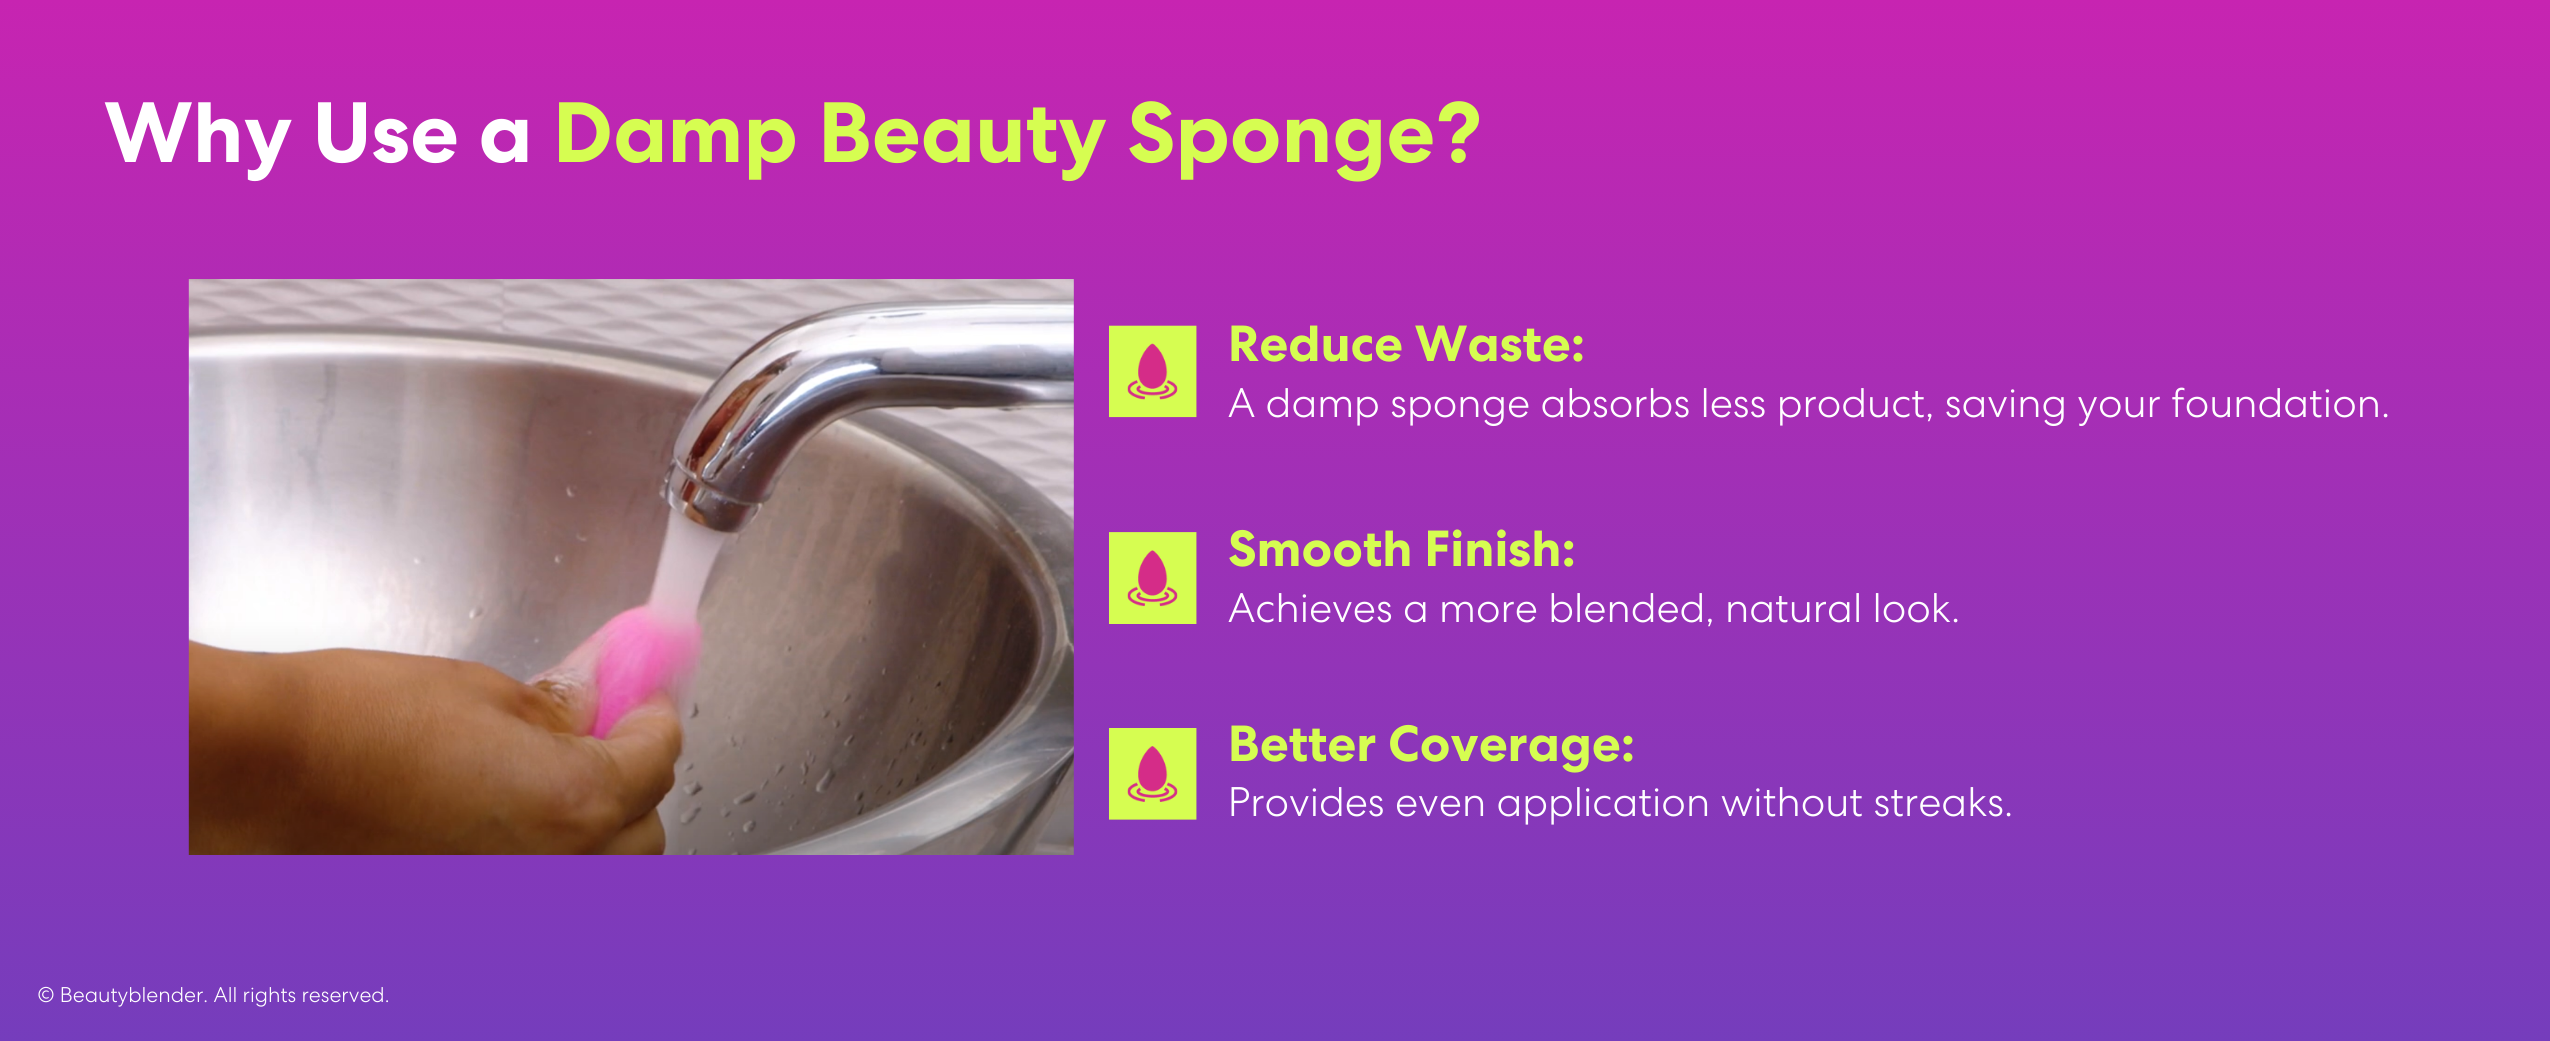
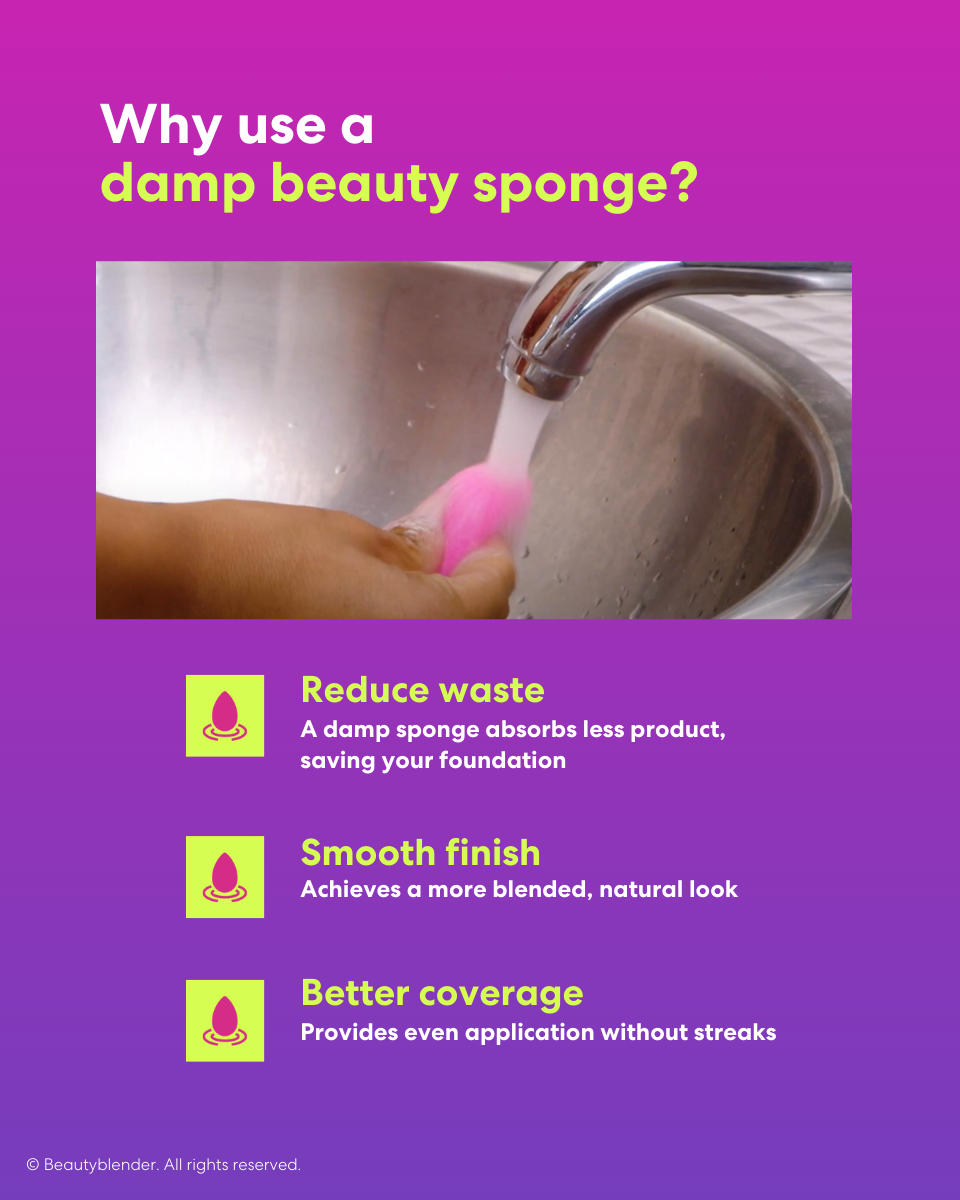
Use a Damp Makeup Sponge
Should you use your Beautyblender damp or dry? If you've asked yourself this question, you're not alone. It's a question that baffles many people. Here's the kicker: You should always use a damp Beautyblender.
While using a dry sponge is a common blender mistake, you should always use a wet one to reduce foundation waste and achieve a smoother and more blended finish.
Replace Your Beautyblender
Beautyblenders aren't designed to last forever. Eventually, you'll need to replace yours. A Beautyblender that doesn't apply foundation effectively is one of the telltale signs you should replace your makeup sponge.
As a rule of thumb, you should replace your beauty sponge seasonally or every three months for optimal foundation application.
Tap, Don't Rub Liquid Foundation
You shouldn't apply your liquid foundation like moisturizer or cleanser. Always use dabbing motions to apply your liquid foundation, and never rub to avoid an uneven and blotchy finish.
Apply Liquid Foundation From the Middle Out
Apply your liquid foundation from the middle out. Start at the center of your face, move towards your cheeks, and slowly blend outwards. Once you're done blending, apply a light coat of foundation to areas with visible blemishes to achieve your desired finish.
Get a New Makeup Sponge If You See Mold
Mold can grow on your makeup sponge if you don't wash, dry, or store it properly. If you spot small or large dark spots on your Beautyblender, you should dispose of it as it's most likely mold. Mold can cause skin irritation, acne, and other skin complications, so don't take chances if you spot mold on your makeup sponge. Bin it.
Replace Your Beautyblender Every Three Months for Best Results
You should replace your Beautyblender every three months or every season. Regularly replacing your makeup sponge ensures optimal performance and hygiene, helping you maintain a flawless makeup application. By matching your replacement schedule with the seasons, you can easily keep track of when it is time to get a new Beautyblender.
Texture Changes in Your Beautyblender Signal It's Time to Replace
Your Beautyblender should feel supple when you squeeze it. If your makeup sponge is dry and hard, it probably has residue built up inside that you can't squeeze out. If it starts feeling stiff, dried out, or resistant, it is time to discard it and get a new makeup sponge.
If Your Beautyblender Becomes Ineffective, It's Time to Replace It
A fresh Beautyblender should deliver flawless results every time you apply concealer or foundation. If you notice your makeup looks cakey, streaky, or uneven, it’s a sign that your Beautyblender needs to be replaced.
If you have been taking good care of your skin but still have breakouts, consider throwing away your makeup sponge. If you haven't made any changes to your hormones, medications, or cosmetics, your makeup sponge could be the culprit.
How Seasonal Beautyblender Replacement Supports Sustainable Makeup Practices
Replacing your Beautyblender seasonally is a key step in supporting sustainable makeup practices. By changing your Beautyblender only four times a year, you significantly reduce the number of disposable makeup sponges that end up in landfills.
High-quality Beautyblenders are designed to last for three months, ensuring that each sponge is used to its full potential before being replaced. This practice not only minimizes waste but also ensures that you are always using a clean, hygienic tool for your makeup application.
Additionally, Beautyblender offers eco-friendly options, such as the Bio Pure Beautyblender, made from 60% plant-based materials, further reducing environmental impact.
Embracing seasonal replacement of your Beautyblender helps you maintain an eco-conscious beauty routine that contributes to a healthier planet.
Put Your Best Face Forward With a New Beautyblender
Your Beautyblender is designed to provide a flawless makeup application for up to three months. After three months, get a new one to avoid bacteria buildup. Leftover makeup and dirt can cause skin irritation. This can also affect how your makeup looks when you apply it. Regular replacement ensures that your makeup routine remains hygienic and effective, giving you a smooth and even finish every time.
If you notice any of the seven signs above, don't take any chances. Get a Beautyblender replacement as soon as possible. Your skin will thank you!
FAQs
How Often Should You Get a New Beautyblender?
Replace your Beautyblender every three months or every season for easier remembering.
It’s easy: New Season. New Sponge.
If you don't wear makeup often, you can wait three months before replacing it. If you wear makeup daily and do touch-ups, you may need to replace it sooner.
How Do You Know When to Throw Out Your Makeup Sponge?
You should throw out your makeup sponge if you notice visible damage, discoloration, or texture changes. Throw away your makeup sponge if it has mold, smells bad, or stops working well for applying makeup.
Why Should You Replace Your Beautyblender Every Three Months?
Replace your Beautyblender every three months to avoid collecting dirt, dead skin cells, and bacteria. These germs could potentially cause skin irritation if you transfer them to your face as you apply makeup. For easy recall, remember to replace your makeup sponge every new season.
How Do You Know When to Replace Your Cosmetic Sponge?
Replace your cosmetic sponge if it is damaged or over three months old.
Remember: New Season. New Sponge.
Also, replace it if the texture changes or if you see spots that won't come off with deep cleaning. Additionally, consider replacing your makeup sponge if your makeup isn't looking as flawless as usual. Finally, if you are experiencing breakouts that are not caused by changing cosmetics, hormones, or medications, consider using a new sponge.
How Can I Make My Beautyblender Last Longer?
To make your Beautyblender last longer, ensure you clean it thoroughly after each use and allow it to air dry completely. Store your Beautyblender in a well-ventilated area to prevent mold and bacteria growth, which can help extend its longevity. For optimal use and durability, use a Blender Defender to store your Beautyblender and our Blendercleanser to clean after every use.
How Do I Know When My Makeup Sponge Is No Longer Good?
When you start recognizing wear and tear, fading, staining, rips, spots, or texture changes, you may want to consider replacing your makeup sponge.
How Can I Tell if My Makeup Blender Has Mold?
Dark spots on your makeup blender are obvious signs of mold growth. If your makeup blender also has a musky odor, it could indicate mold growth. If you suspect your makeup blender has mold but aren't certain, it's best to discard it. Using a makeup sponge with mold can harm your skin and cause issues like rashes, itching, or acne.
Should I Use My Makeup Sponge Wet or Dry?
You should always use a slightly wet makeup sponge for a more natural finish. Although Beautyblender is specifically designed to prevent soaking up excess product, using a wet makeup sponge can also help prevent streaks and lines. The damp sponge ensures that your makeup blends seamlessly into your skin, providing a dewy, airbrushed look. Additionally, using a wet Beautyblender can minimize product wastage, ensuring that more of your foundation or concealer ends up on your face rather than being absorbed by the sponge.
How do I apply liquid foundation?
To apply liquid foundation like a pro, begin by prepping your skin with moisturizer and primer. Pump or dot a small amount of foundation onto the back of your hand. Use a brush, or a damp makeup sponge, pick up a bit of product and dab it onto the center areas of your face - cheeks, nose, and forehead. Blend outward in light, tapping (stippling) motions. A damp Beautyblender helps create an even, streak-free finish by pushing the product seamlessly into your skin. Build up coverage gradually, focusing more on areas that need extra correction, and be sure to blend along your jawline and hairline for a natural look that melts perfectly into your skin.
How do I apply foundation properly?
Proper foundation application starts before you even touch your makeup. First, cleanse your skin thoroughly to remove oil, dirt, and impurities. Apply a moisturizer suited to your skin type, and don’t skip primer - this helps smooth texture, minimize pores, and keep foundation in place. Pick a foundation that matches your skin tone and undertone. Using a brush, sponge, or your fingers, apply foundation in thin, even layers, starting from the center of your face and blending outward. Build coverage only where needed, and always blend carefully at the edges like your jawline, ears, and hairline to avoid any obvious lines. Finish with a light dusting of translucent powder if you want to lock in your look for the day.
Where should I apply foundation?
Foundation should be focused on the areas where you need the most coverage, usually the center of your face, such as your nose, cheeks, and chin. These spots tend to have more redness or unevenness. Start there, then blend outward using a brush or sponge so the foundation fades seamlessly into the rest of your skin. Don’t forget tricky areas like the sides of your nose and under your eyes. Avoid caking foundation on areas that don’t need it, like your hairline or jaw, to keep the look fresh and natural. By concentrating your application where needed, you’ll achieve an even, glowing complexion that still looks like real skin.
How much foundation should I use?
When it comes to foundation, less is more. Begin with a pea-sized amount, just enough to lightly cover the areas that need evening out. Apply in thin layers and add more only if necessary, especially if you prefer fuller coverage. Over-applying foundation can make your makeup look heavy, cakey, or mask-like. Remember, you can always add extra where you want more coverage (like blemishes or redness), but starting light ensures your skin still looks breathable and radiant. Using a makeup sponge or brush will help you distribute the product evenly and avoid excess buildup.
What should I apply before foundation?
Prepping your skin is a key step before applying foundation. Start with a gentle cleanser to wash away any dirt or oils. Follow up with a hydrating moisturizer to plump and smooth the skin’s surface. Next, apply a primer that matches your skin needs. Primer helps fill in fine lines and pores and ensures your foundation goes on more smoothly and lasts longer. Well-prepped skin creates the perfect canvas for flawless foundation application and can even help reduce the amount of foundation you need.
How do I blend foundation?
Blending is the secret to a natural, airbrushed finish. The best way to blend foundation is with a damp Beautyblender or high-quality makeup brush. Dab foundation onto your face and use bouncing or stippling motions to press the product into your skin, rather than dragging it across the surface. This technique ensures the foundation melts seamlessly and prevents streaks or patchiness.


